Calibrate a Ender 3 V2 running Klipper1 with the following tests.
Calibrate movement
Run the following tests to ensure the hotend and bed are moving correctly and can reach all points of the bed.
Check endstops
This ensures the endstops are connected and configured correctly.
-
Check that all endstops are open
QUERY_ENDSTOPAll endstops should be in the
openstate# x:open y:open z:open -
Push the
xendstop and queryQUERY_ENDSTOPThe
xendstop should be in theTRIGGEREDstate# x:TRIGGERED y:open z:openRepeat for the
yandzendstops
Check stepper motors
This ensure the motor pins are connected and configured correctly.
-
Give the motors room to move back and forth by ensuring each axis can move in either direction freely
-
Buzz the
xstepper motorSTEPPER_BUZZ stepper=stepper_xThe hotend should repeatedly move from the left to the right.
-
Buzz the
ystepper motorSTEPPER_BUZZ stepper=stepper_yThe bed should repeatedly move to the front and back.
-
Buzz the
zstepper motorSTEPPER_BUZZ stepper=stepper_zThe hotend should repeatedly move up and down.
Check homing
This checks the nozzle can reach all four corners of the bed.
The bed is of size 235x235mm with corner coordinates of:
| Corner | x | y |
|---|---|---|
| Front left | 0 | 0 |
| Front right | 235 | 0 |
| Back left | 0 | 235 |
| Back right | 235 | 235 |
-
Home all axis
G28 -
Go into absolute positioning mode2
G90 -
Move to the front left corner
G1 X0 Y0 Z10 F3000 -
Move to the front right corner
G1 X235 Y0 Z10 F3000 -
Move to the back left corner
G1 X0 Y235 Z10 F3000 -
Move to the back left corner
G1 X235 Y235 Z10 F3000
Bed levelling
With a BLTouch3 probe installed, we can perform the following to ensure a level bed.
Configure BLTouch
Add the following to the printer.cfg4:
[bltouch]
sensor_pin: ^PB1
control_pin: PB0
x_offset: -42
y_offset: -10
z_offset: 0

[safe_z_home]
home_xy_position: 117.5, 117.5
z_hop: 10
x_offset, y_offset, z_offset are how far the BLTouch probe is from the nozzle. The z-offset will be adjusted later to ensure the nozzle is the perfect distance from the bed for a perfect first layer.
The above values are for the standard mount provided by BLTouch kit for the Ender 3 V2.
Adjust screws
Before we perform a bed mesh levelling, we should ensure our bed is as flat as possible by adjusting the screws under the bed. Klipper has automated tools for determining how much each screw needs to be adjusted5.
-
Add the following to the
printer.cfgto configure where each screw is located beneat the bed (screws on an Ender 3 V2 are offset by 32mm from the edges of the bed)[screws_tilt_adjust] screw1: 74, 42 screw1_name: Front left screw2: 245, 42 screw2_name: Front right screw3: 245, 213 screw3_name: Back right screw4: 74, 213 screw4_name: Back left screw_thread: CW-M4 horizontal_move_z: 10The location for each screw is calculated as follows:
Screw x y Front left 0 + screw_x_offset - bltouch.x_offset0 + screw_y_offset - bltouch.y_offsetFront right 235 - screw_x_offset - bltouch.x_offset0 + screw_y_offset - bltouch.y_offsetBack left 0 + screw_x_offset - bltouch.x_offset235 - screw_y_offset - bltouch.y_offsetBack right 235 - screw_x_offset - bltouch.x_offset235 - screw_y_offset - bltouch.y_offsetThe above values are for the standard mount provided by BLTouch kit for the Ender 3 V2.
-
Calculate how much each screw needs to be adjusted
SCREWS_TILT_CALCULATEEach screw will be probed by the printer to produce a readout similar to the following where adjustments to each screw is displayed:
# Front left (base) : x=74.0, y=42.0, z=-0.11500
# Front right : x=245.0, y=42.0, z=-0.10000 : adjust CCW 00:30
# Back right : x=245.0, y=213.0, z=-0.16500 : adjust CW 00:42
# Back left : x=74.0, y=213.0, z=-0.17000 : adjust CW 00:22
The adjustments are based on a clock, where
CWis clockwise andCCWis counter clock-wise. The amount of adjustment is in minutes. So for example,CCW 0:30means to turn the screw 180 degrees counter clockwise. -
Repeat the above step until the adjustments are no more than 6 minutes each
Perform bed mesh levelling
We need to generate a height map for a series of points across the bed to cater for warped bed surfaces. Klipper has an auto bed levelling procedure to automate this6.
-
Add the following to
printer.cfg[bed_mesh] speed: 120 horizontal_move_z: 10 mesh_min: 15, 15 mesh_max: 205, 205 probe_count: 5,5 algorithm: bicubic fade_start: 1 fade_end: 10 fade_target: 0probe_countsets the size of the mesh, in this case 5 by 5, resulting in 25 points to be probed. -
Run the auto bed levelling procedure
BED_MESH_CALIBRATE -
When complete, save the mesh
SAVE_CONFIGThe mesh will be saved to the
printer.cfglike so:#*# [bed_mesh default] #*# version = 1 #*# points = #*# -0.122500, -0.097500, -0.062500, -0.042500, 0.002500 #*# -0.047500, -0.030000, 0.017500, 0.032500, 0.072500 #*# -0.055000, -0.030000, 0.020000, 0.040000, 0.087500 #*# -0.070000, -0.062500, -0.017500, 0.000000, 0.045000 #*# -0.130000, -0.132500, -0.102500, -0.082500, -0.052500 #*# tension = 0.2 #*# min_x = 15.0 #*# algo = bicubic #*# y_count = 5 #*# mesh_y_pps = 2 #*# min_y = 15.0 #*# x_count = 5 #*# max_y = 205.0 #*# mesh_x_pps = 2 #*# max_x = 205.0
Adjust the z_offset
This ensures the nozzle is the perfect distance from the bed for a perfect first layer.
-
Find a piece of paper and place it under the nozzle. I have found a Post-it note7 to be a good thickness.
-
Start the calibration
PROBE_CALIBRATE -
Adjust the nozzle height until there is friction on the paper To go down:
TESTZ Z=--To go up:
TESTZ Z=++ -
Once the nozzle is at the correct height, save the
z_offsetSAVE_CONFIGThis will appear in the
printer.cfglike so:#*# [bltouch] #*# z_offset = 5.063
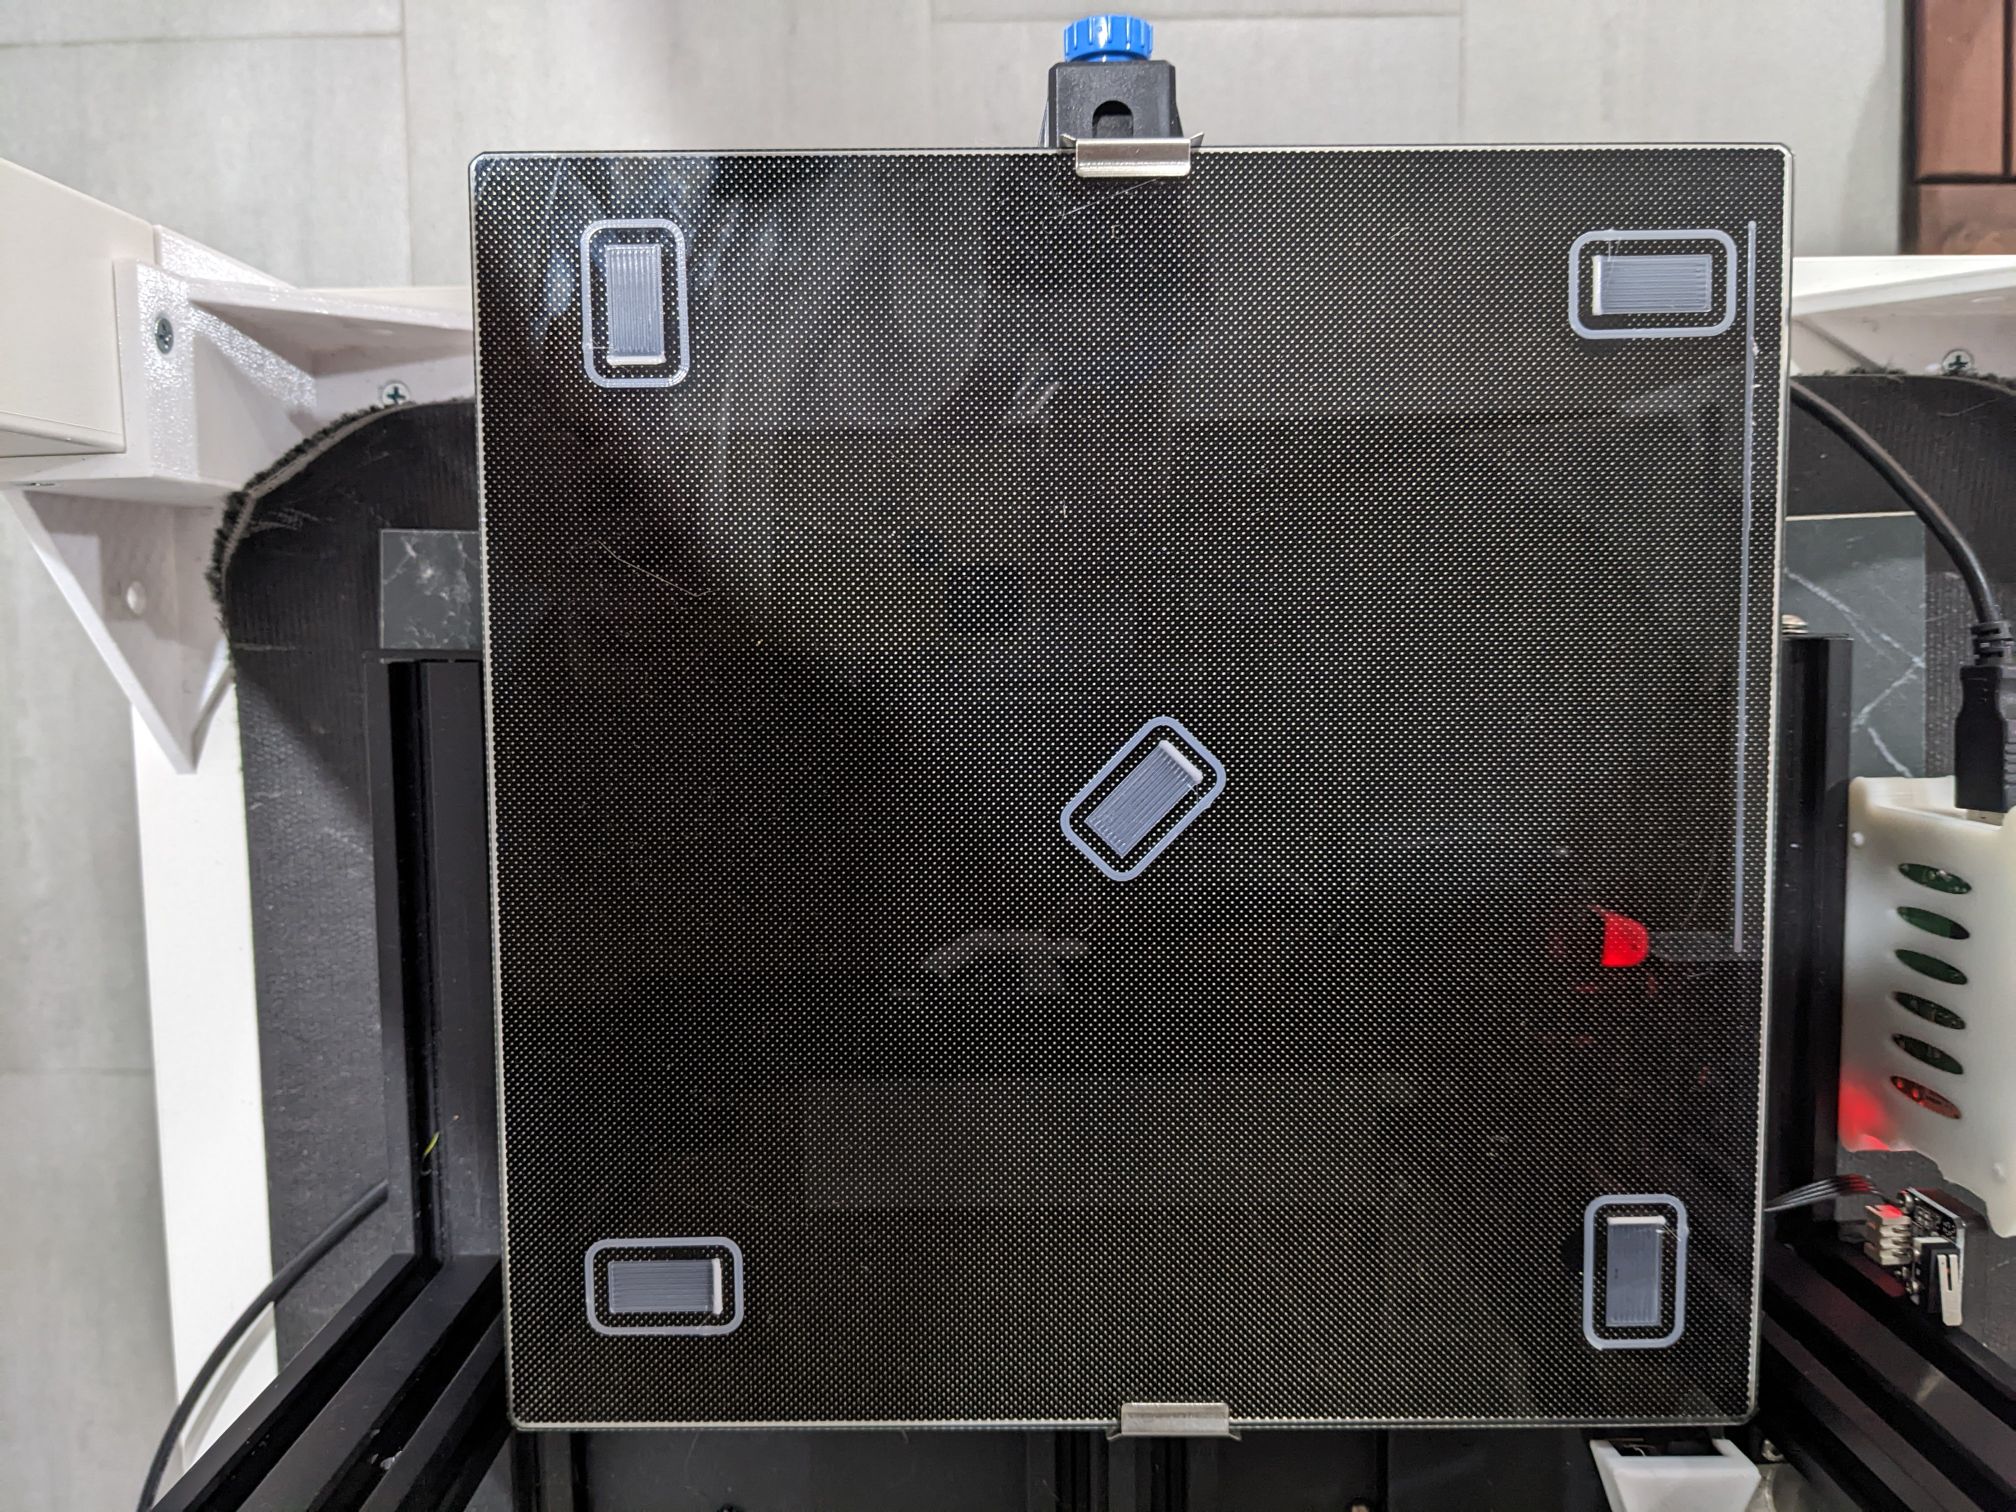
Run a calibration print
After going through the above configuration we can confirm everything by running a calibration print.
-
Use SuperSlicer8 to generate the calibration G-code
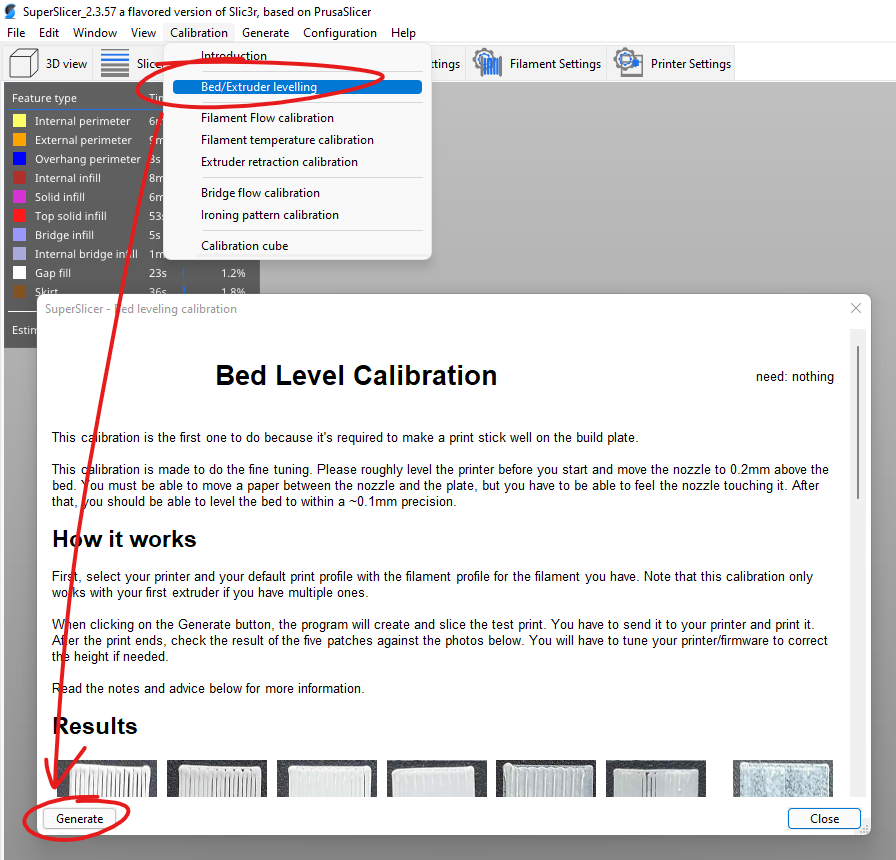
The content within the dialog describes what a successful print should look like.
-
A successful print should look like the following
Calibrate temperate
This ensures the nozzle and bed heaters are able to keep the temperature stable9.
-
Turn the part fan to 100% to simulate real cooling
M106 S255 -
Tune the extruder
PID_CALIBRATE HEATER=extruder TARGET=200The
TARGETshould be close to the typical printing temperature for the filament. 200 is good for PLA. -
Save the config
SAVE_CONFIGThis will appear in the
printer.cfglike so:#*# [extruder] #*# control = pid #*# pid_kp = 20.237 #*# pid_ki = 1.054 #*# pid_kd = 97.138 -
Tune the heater bed
PID_CALIBRATE HEATER=heater_bed TARGET=60The
TARGETshould be close to the typical printing temperature for the filament. 60 is good for PLA. -
Save the config
SAVE_CONFIGThis will appear in the
printer.cfglike so:#*# [heater_bed] #*# control = pid #*# pid_kp = 70.405 #*# pid_ki = 1.025 #*# pid_kd = 1209.203
Footnotes
-
https://www.klipper3d.org/BLTouch.html#connecting-bl-touch ↩
-
https://www.klipper3d.org/Manual_Level.html#adjusting-bed-leveling-screws ↩
-
https://www.post-it.com.au/3M/en_AU/post-it-au/products/~/Post-it-Super-Sticky-Notes-76-x-76-mm-Neon-Pink-5-Pads-Pack-654-5SSNP/?N=4327+3291610975+3294529197&preselect=5927575+3293786499&rt=rud ↩